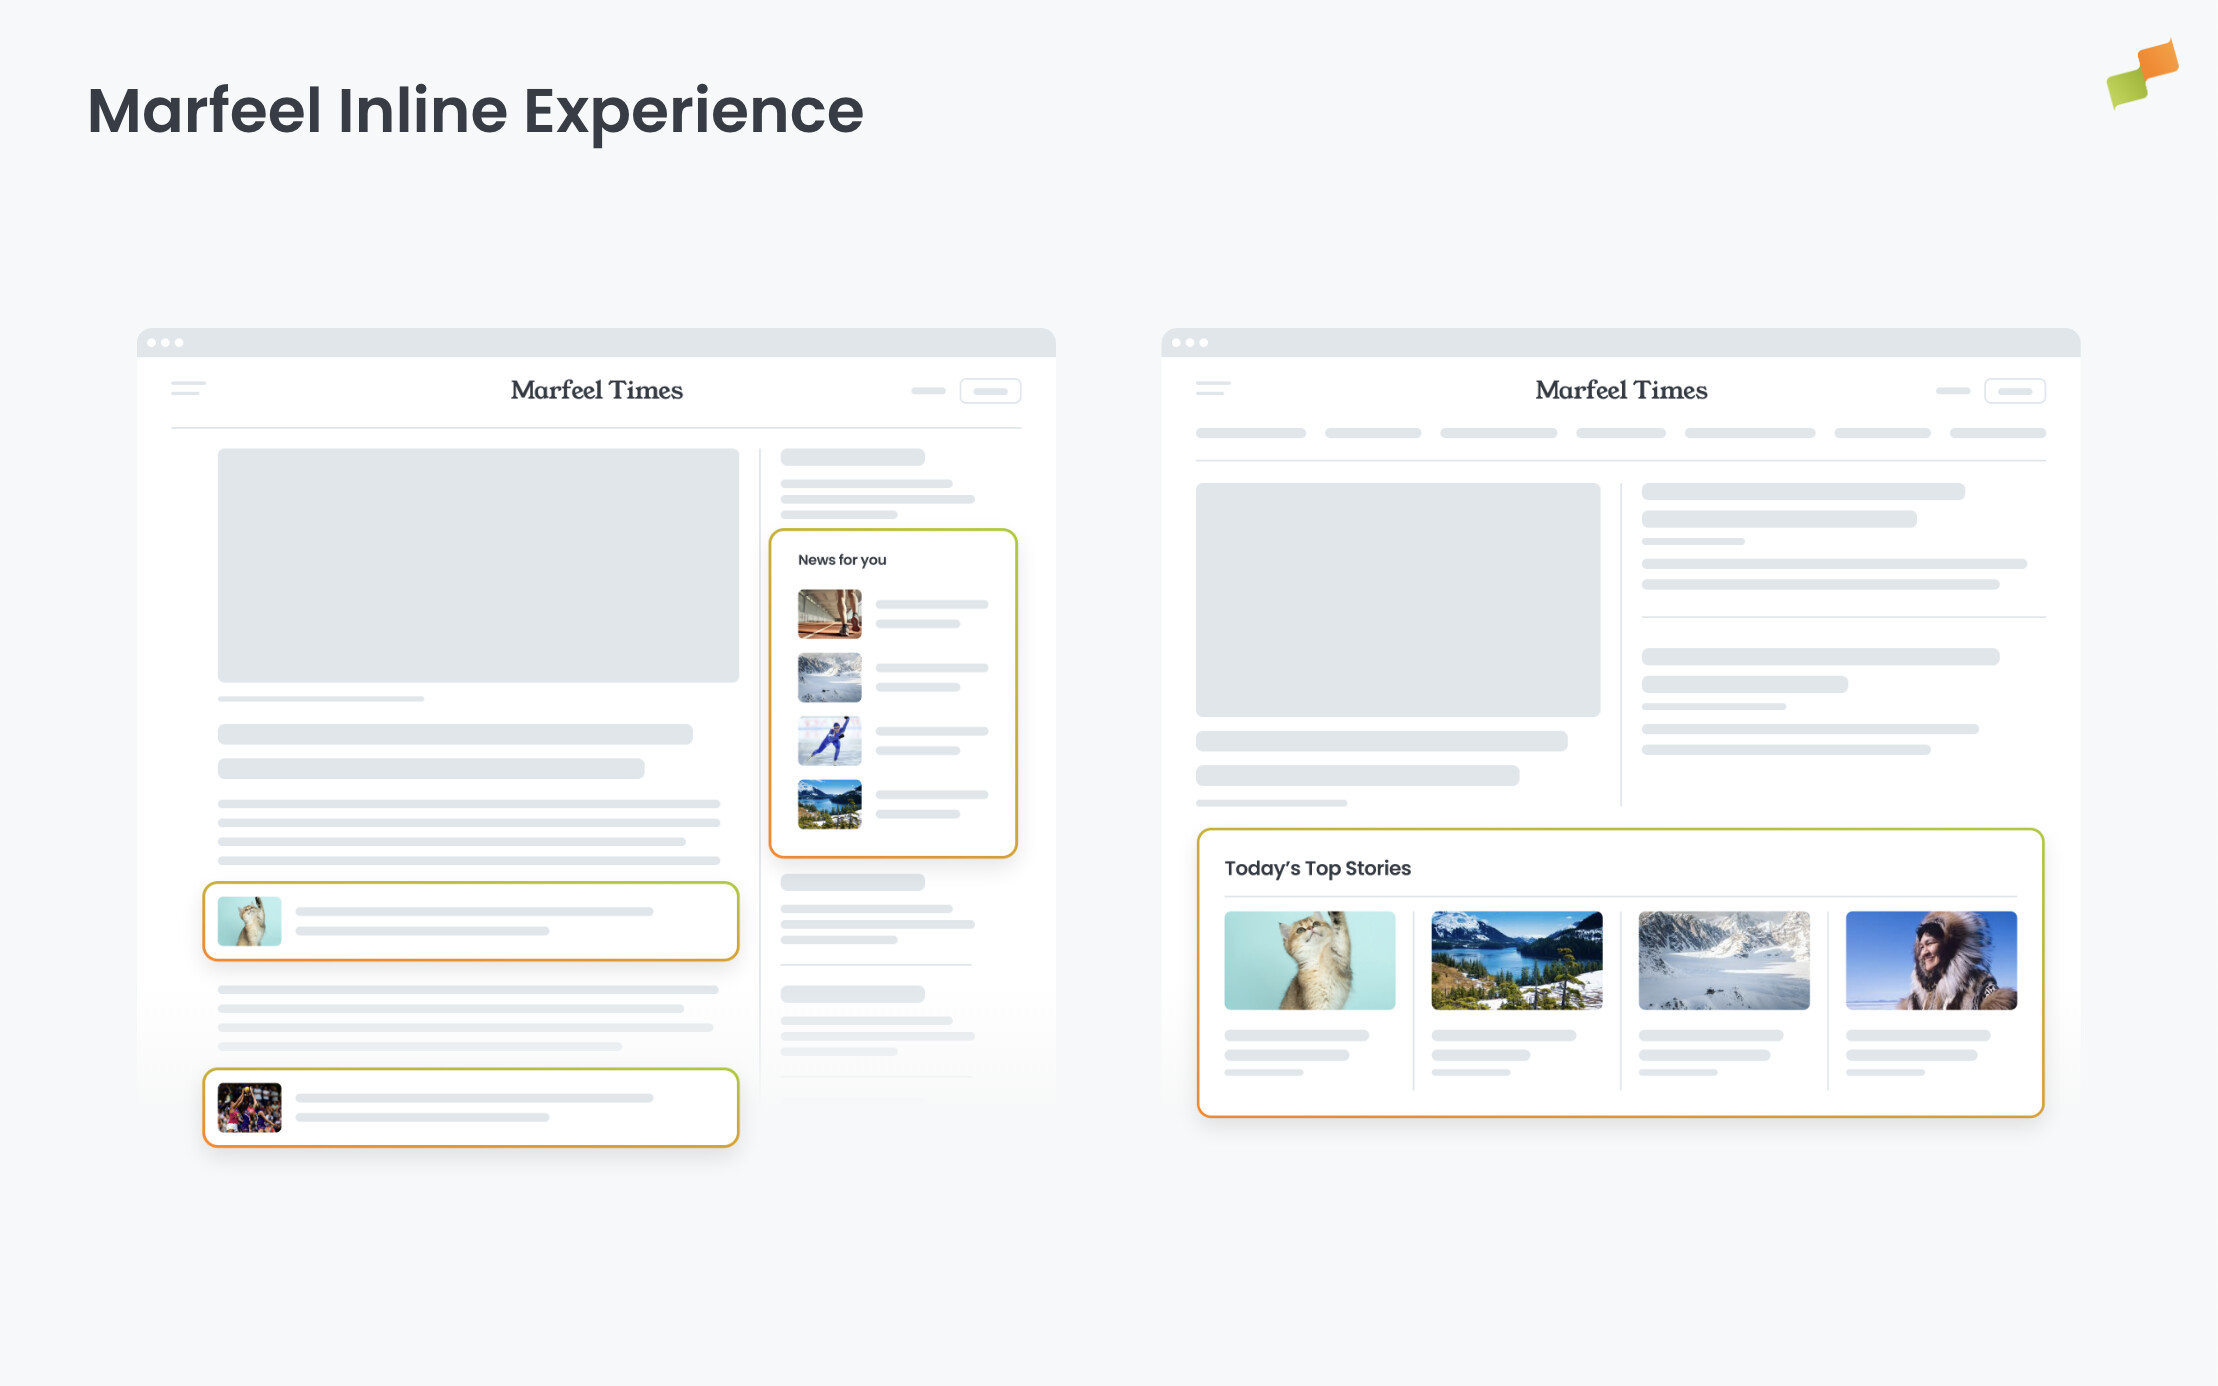
Inline experiences inject content directly into the page DOM. The injected HTML inherits your site’s CSS, so the experience looks and behaves like native page content.
How Inline experiences work
An Inline experience inserts HTML at a position you define with a CSS selector. The insertion happens directly in the DOM — the experience’s markup becomes part of the page structure, not an overlay or iframe.
Because the HTML lives inside the DOM, your site’s existing stylesheets apply to it automatically. Fonts, colors, spacing, responsive breakpoints — all of it cascades onto the injected content. The result is an experience that blends completely with the surrounding page elements.
The experience can also inject its own JavaScript and additional styles. This means you get the best of both worlds: native look-and-feel from inherited CSS, plus the ability to extend behavior and styling beyond what the page already provides.
The Strategy dropdown in the Format tab controls how the experience HTML is placed relative to the target element:
| Strategy | Behavior |
|---|---|
| Append | Adds the experience HTML as the last child inside the target element |
| Replace | Removes the target element and inserts the experience HTML in its place |
| Insert Before | Places the experience HTML immediately before the target element |
| Insert After | Places the experience HTML immediately after the target element |
| Reorder | Rearranges existing child elements within the target element. Exclusive to Recommender experiences — enables Module Reorder mode |
Configure placement
The CSS selector and strategy define where and how the experience appears. In the Format tab:
- Select a Strategy from the dropdown: Append, Replace, Insert Before, Insert After, or Reorder.
- Enter a CSS selector in the CSS Selector field — or use the visual selector to pick an element directly from the preview (see below).
- Check the preview panel to verify how the experience renders at that position.
Important: If the CSS selector does not match any element on the page, the experience will not appear. A warning displays below the CSS Selector field when this happens.
Visual element selector
You don’t need to write CSS selectors manually. Click the locator icon next to the CSS Selector field to activate the visual selector. The preview enters selection mode — hover over any element on the page and click to highlight it. Once selected, click Select element and Copilot generates an optimized CSS selector for that element automatically.
The breadcrumb bar at the top of the preview shows the DOM hierarchy for the selected element. Click any breadcrumb to traverse up to a parent element or down into a child. This lets you fine-tune exactly which element the experience targets without editing the selector by hand.
Multiple CSS Selectors
A CSS selector that works in one article may not exist in other articles due to different layouts or content types. To handle this, specify multiple CSS selectors in the CSS Selector field by separating them with commas.
The experience will prioritize the first selector that finds a match. Unlike native browser behavior — which selects all matching elements — the Inline experience uses the first selector in the list that successfully matches an element on the page.
Example: Use .my-video-class, .my-subtitle-class to target the video element in articles that feature a video, and the subtitle in articles that don’t.
Placement Fallbacks
For more complex placement logic, define multiple placement configurations. Each placement acts as a fallback for the previous one. If a placement’s CSS selector isn’t found, the next placement in the sequence is used.
Use cases for placement fallbacks:
- Automate inline recommendations only when the article’s author didn’t manually insert them from the CMS
- Insert a CTA below the first inline image, or above the third paragraph if no image exists
For any placement that is not the last one, a Do Nothing strategy is available. This allows you to check for an element’s existence without inserting content, then fall back to the next placement if the element is found.
Triggers
Triggers control when the Inline experience activates. By default, the experience injects content as soon as possible. To delay or condition activation, click + Add trigger in the Format tab.
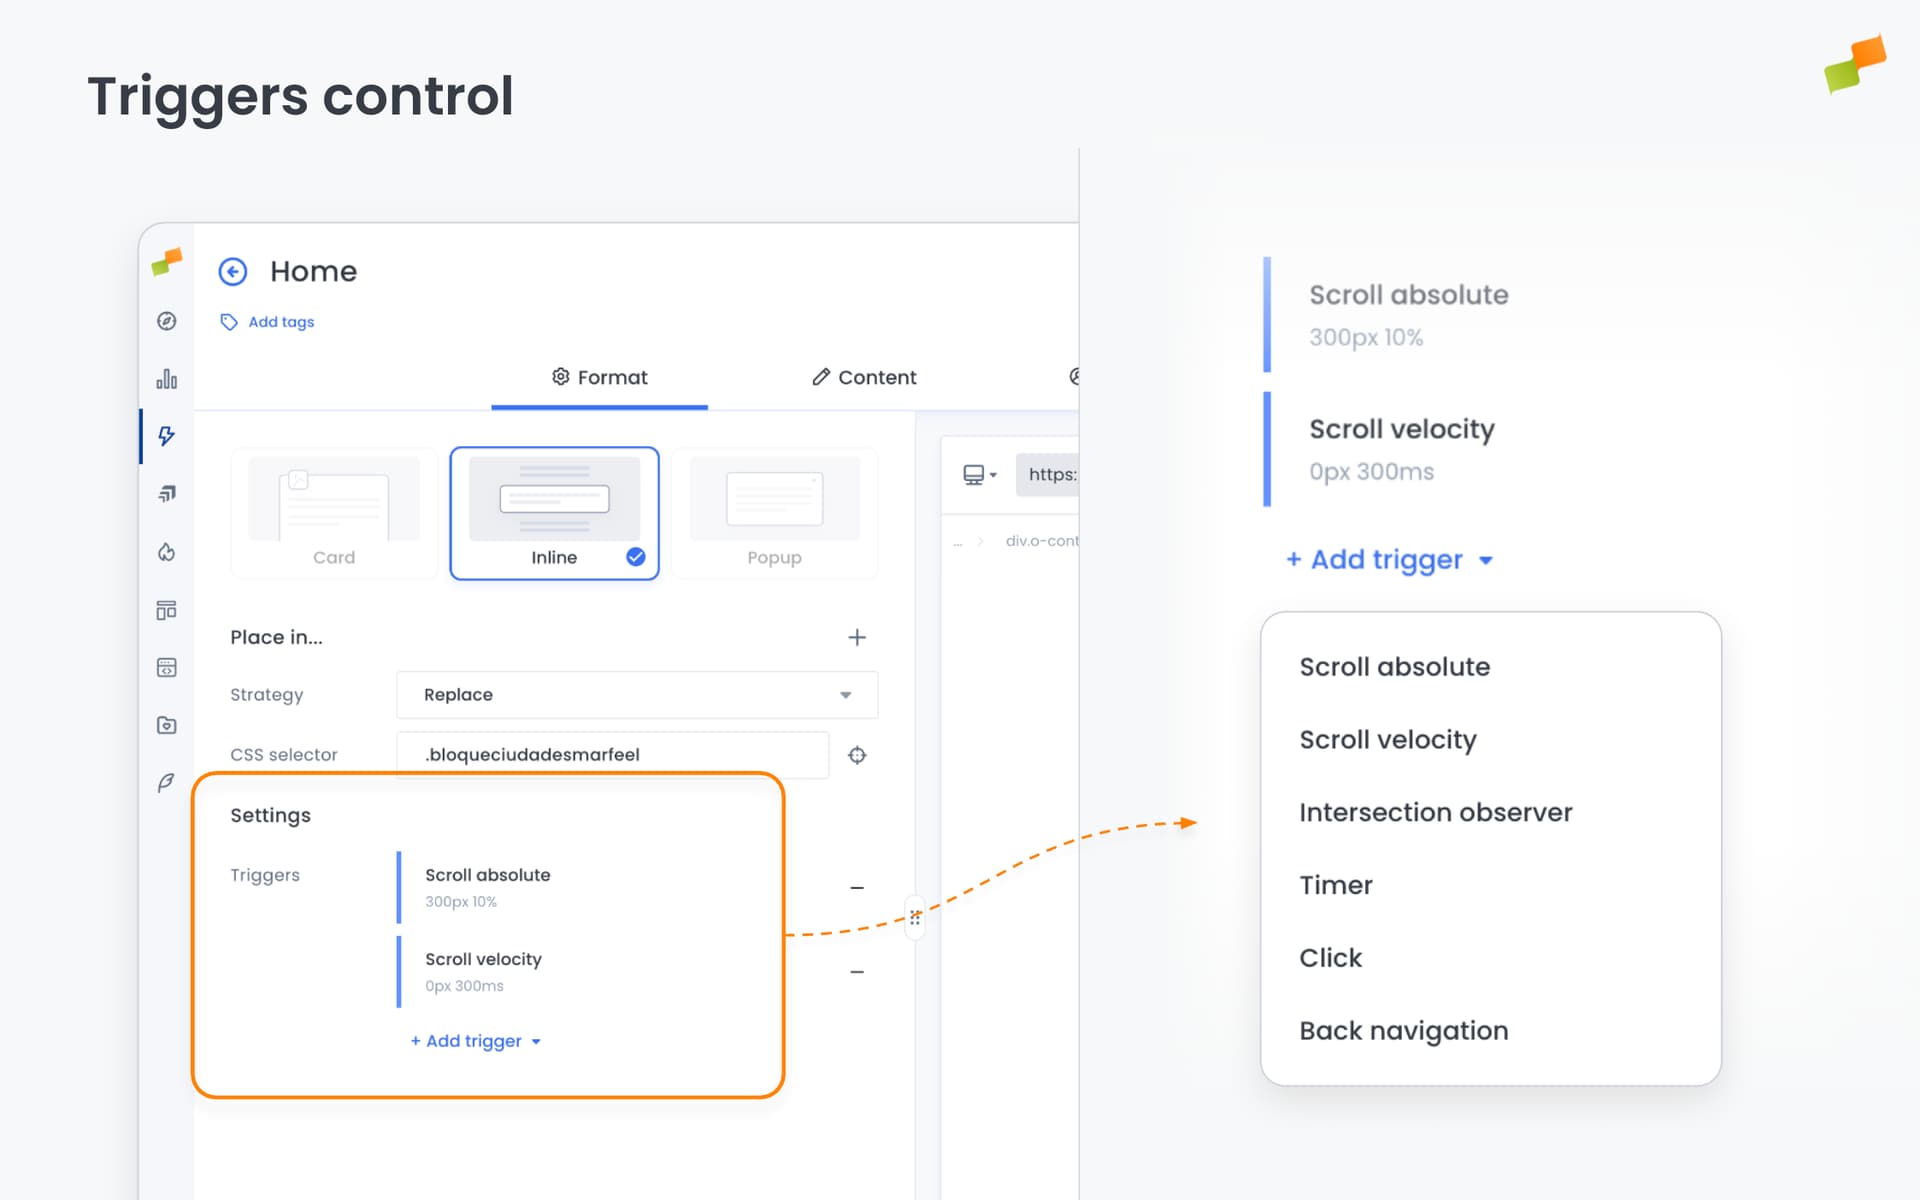
Six trigger types are available: Scroll Absolute, Scroll Velocity, Intersection Observer, Timer, Click, and Back Navigation. See Triggers Reference for full descriptions, parameters, and use cases.
Inline-specific behavior: All triggers cause immediate injection into the DOM at the configured CSS selector position. There are no format-specific trigger behaviors for Inline experiences.
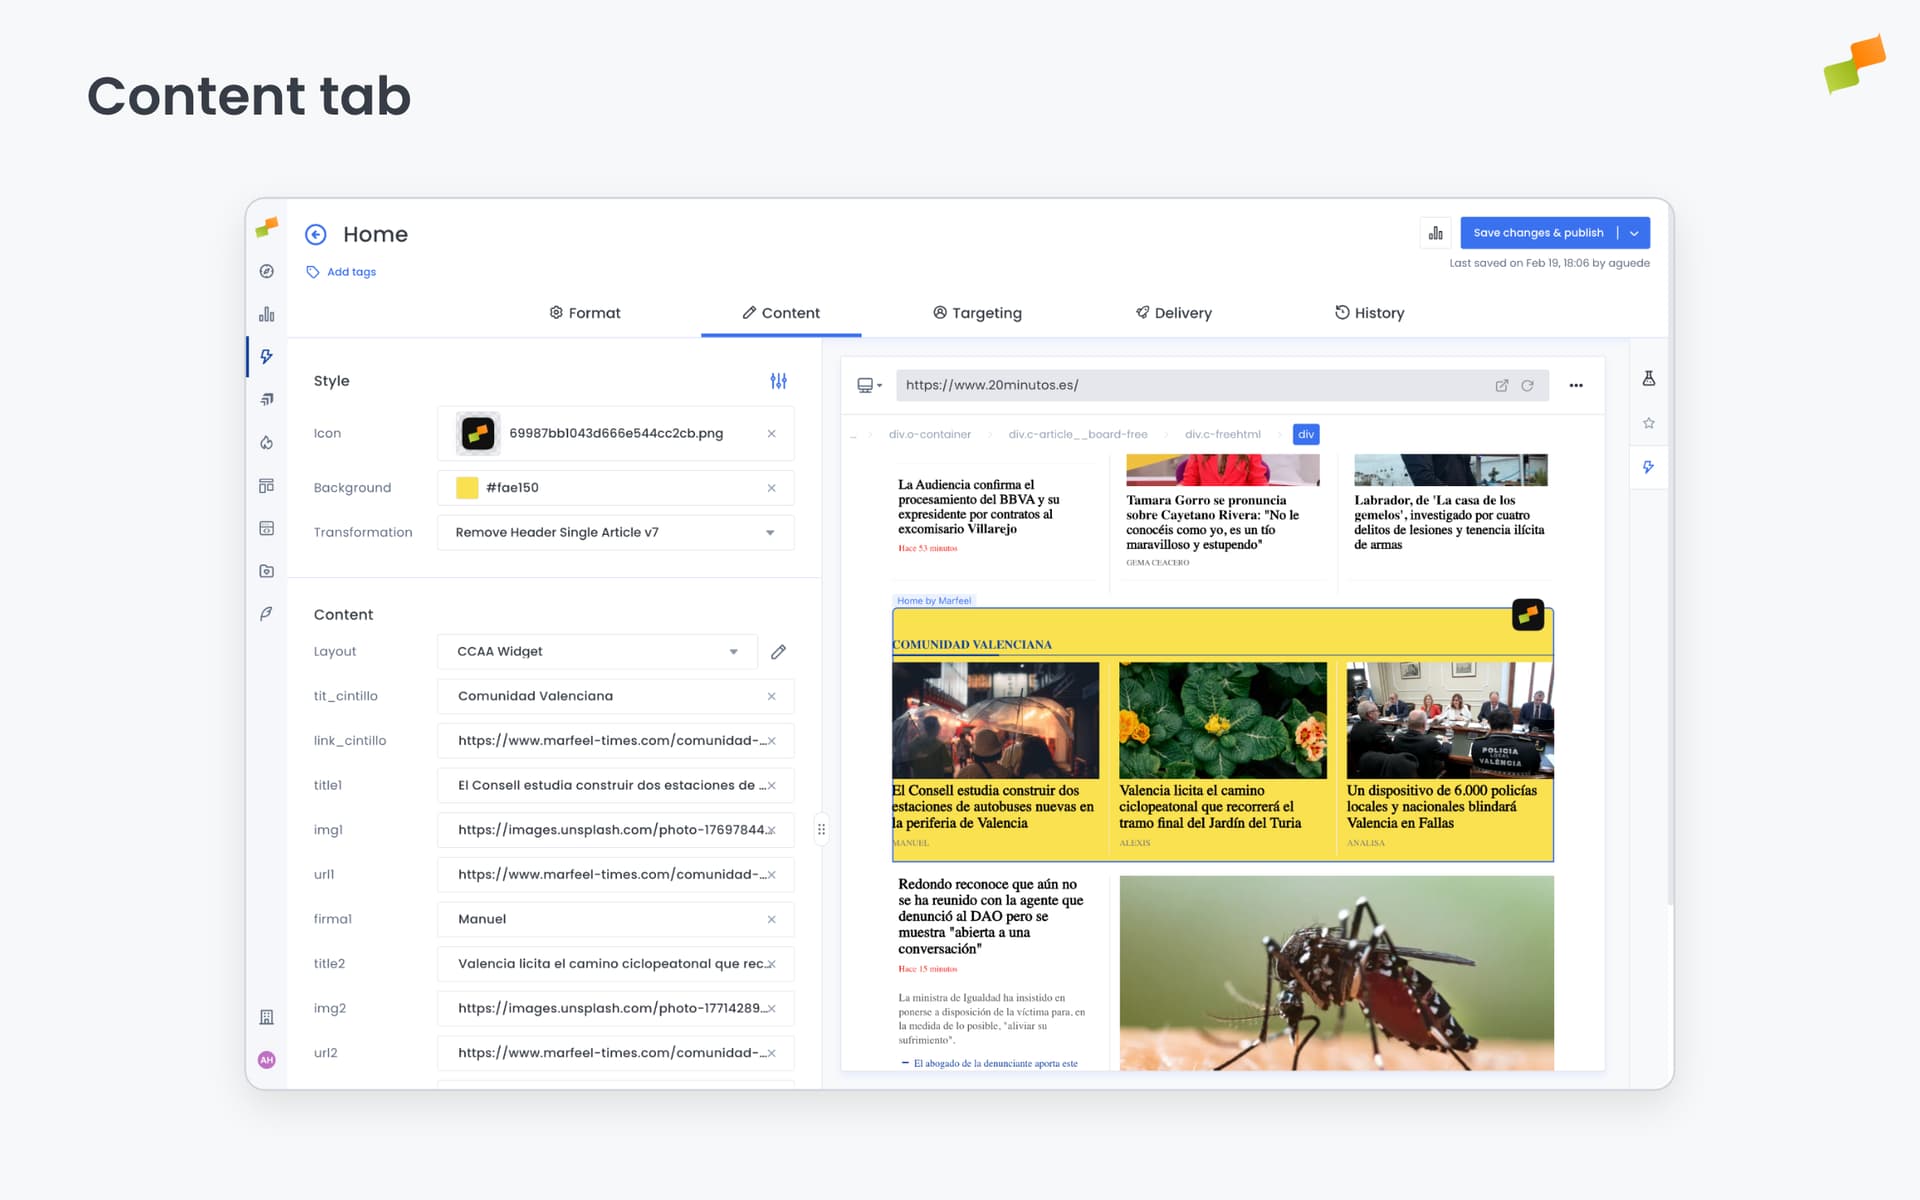
Content
The Content tab defines what the Inline experience displays. What you see here depends on the blueprint you started from.
Recommender experiences configure a ranking algorithm (Most Read, Trending, Personalized, and others), content filters, time windows, and fallback behavior. The layout determines how recommended articles render — thumbnails, headlines, metadata — in single-column, multi-column, or grid arrangements.
Forms provide newsletter signups, lead generation fields, and subscription prompts.
Podcast and video embeds place media players directly in the page flow.
All Inline experiences share a common set of style options in this tab: Header and Icon, Colors, and Hero Image that the underlying layout can use.
Copilot can generate layouts automatically. Select an existing page element in the preview and click Generate to create a matching HTML layout.
Full details: Content and Recommender
When to use Inline
- Below-article content recommendations
- In-content newsletter signup forms
- Personalized homepage modules that inherit publisher styles
- Native-looking content blocks that match your site’s design
- Subscription offers and lead generation CTAs within the reading flow
- Affiliate and product catalogs at specific content positions
Going deeper
- Experience Manager Overview: The four-tab editor walkthrough.
- Delivery & Scheduling
- Triggers
- Targeting
- A/B Testing
- Blueprints
- Inline: DOM injection, CSS selector placement, and visual element selector.
- Popups: Modal vs contextual modes, position, triggers, and orchestration.
- Flowcards: Isolated AMP rendering, snap points, card icons, and browser history integration.
- Tag Experiences: SDK configuration for tracking, integrations, and third-party tools.
- Recommender: Configure recommendation engines and layouts.
- Page Transformations
- Testing and Troubleshooting: Preview, live test, and debug your experiences.
- Web Activation: How the SDK delivers experiences on your site.
- AMP Activation: Run Flowcards on AMP pages.