Marfeel’s workspaces have numerous management options to enable you to keep your reports and your data organized and to make it easier to deliver said data to the stakeholders who need it.
Creating Workspaces
Creating Directly
- Go to the Workspace Overview and click on
New workspace.
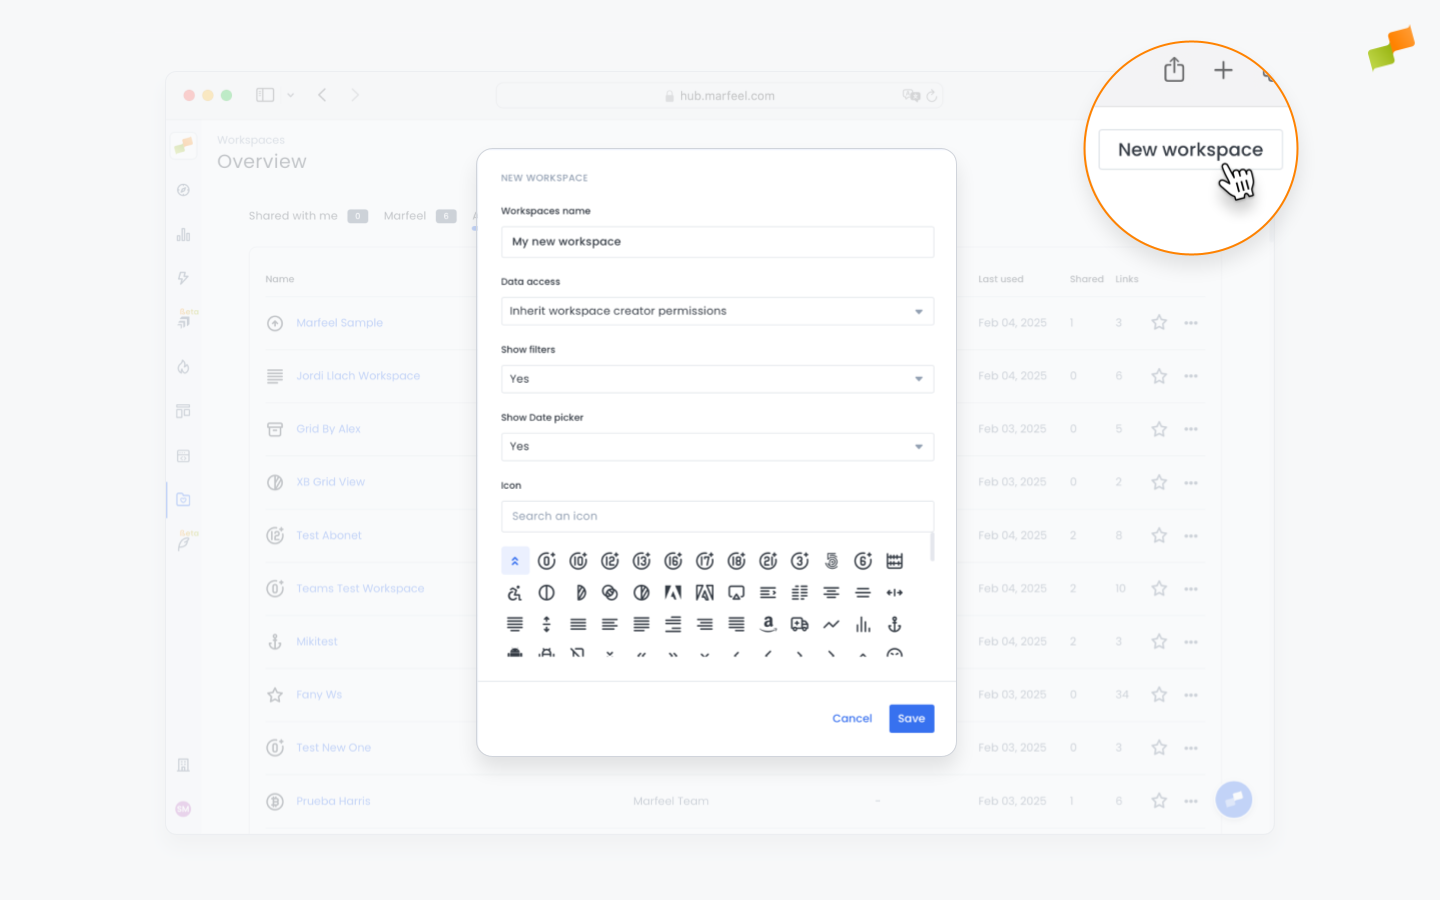
- Enter a name, choose the level of access and editing capabilities you want your workspace to have, and click
Save.
When Saving a Report
- You can also create a new workspace in the moment you save a report. You will be prompted to do so and will be asked to follow the same process described above.

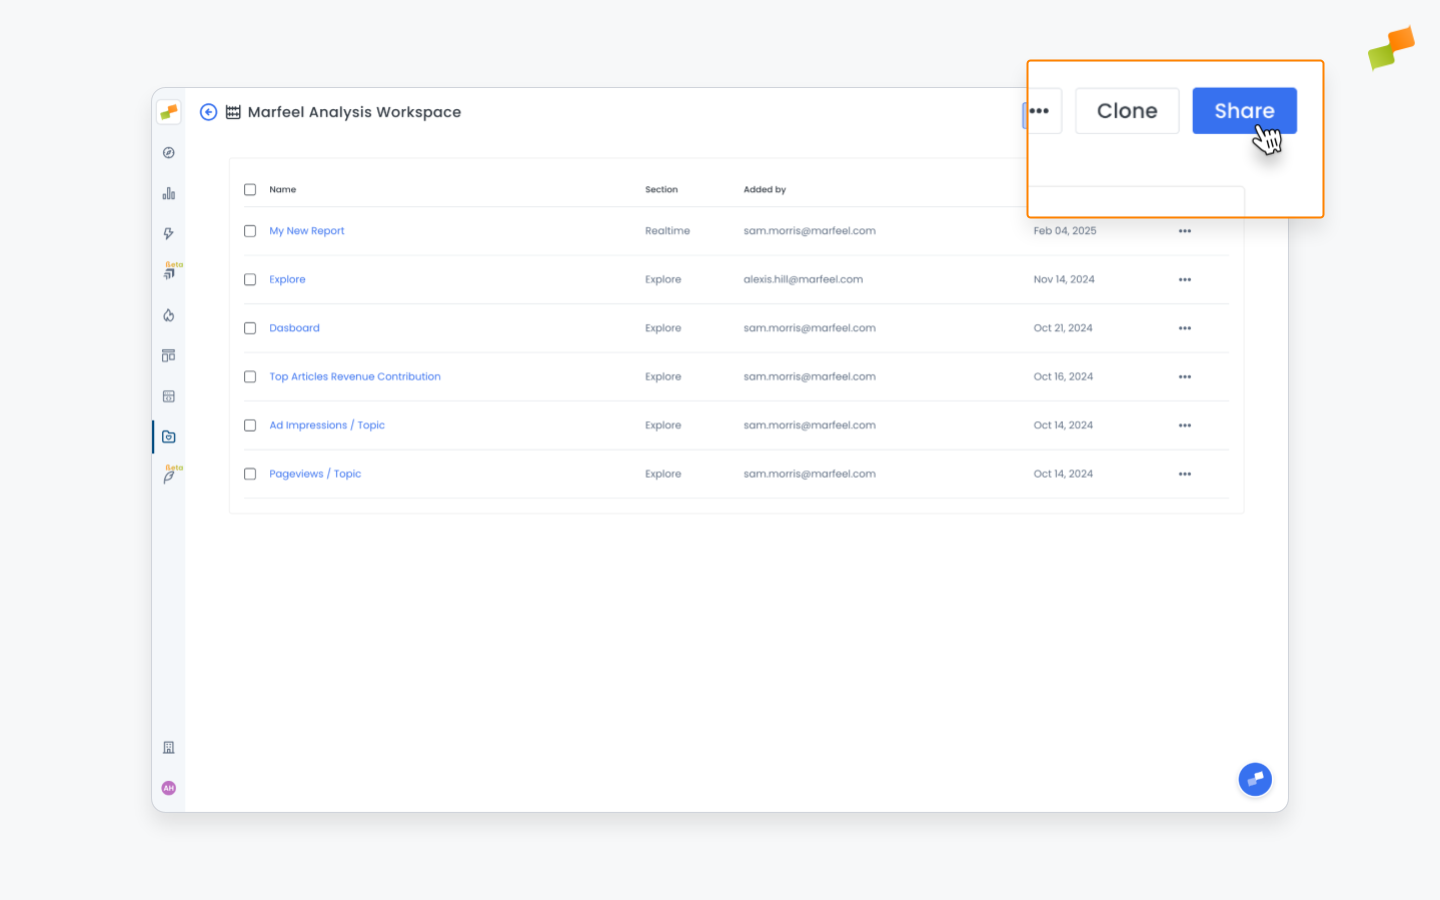
Sharing Workspaces
Sharing workspaces keeps everyone organized and increases productivity and alignment between stakeholders and teams by giving people access to the data they need.
- To share a workspace, simply click on the
Sharebutton in the top right.
- You will be prompted to choose who you wish to share the workspace with. You can search for any colleague or team that has a profile in Marfeel.

- Finally, you will be asked to choose what level of access you wish to give the people with whom you share the workspace.

User Roles
There are three roles users can have in relation to a workspace:
-
Owner: They are able to change the workspace’s parameters, share it with other users, clone it, and delete it. They are also able to add, change, and remove reports from a workspace. Lastly, they can freely manipulate dashboards, resize reports, and change visualization modes.
-
Co-owner: Same permissions as the owner. This role exists to give users other than the creator of a workspace the ability to manage and edit it.
-
Viewer: Can view the workspace and the reports it contains, as well its dashboard version. Can’t edit the configuration of these.
Permissions
When setting un a workspace, owners are able to select whether users inherit data access permissions:
- Inherit workspace creator permissions: Users with access to the report will see the data as it appears, without restrictions imposed by their role neither data restrictions.
- Restrict to user permissions: Users with access to the report will only see the data they are allowed to see by their role and data restrictions.
For example, if you select Inherit, a Viewer who is given access to a dashboard by an Analyst will be able to view all the data in that dashboard, regardless of whether they weren’t able to view that data elsewhere in Marfeel.
Conversely, if the workspace is set to Restrict, said user would only be able to view the data they could normally view and any reports containing data that is off limits would not render for them.
Visit our documentation to learn more about data restrictions.
Sharing workspaces templates with other Marfeel accounts
Marfeel makes it possible to share your workspaces across different Marfeel accounts. This allows analysts to spread their knowledge and know-how to colleagues working at other publications, or for consultants to transfer their knowledge and frames of analysis between different accounts.
- To share a workspace template with another account, open the sharing menu and click on
Copy dashboard template URLat the bottom.
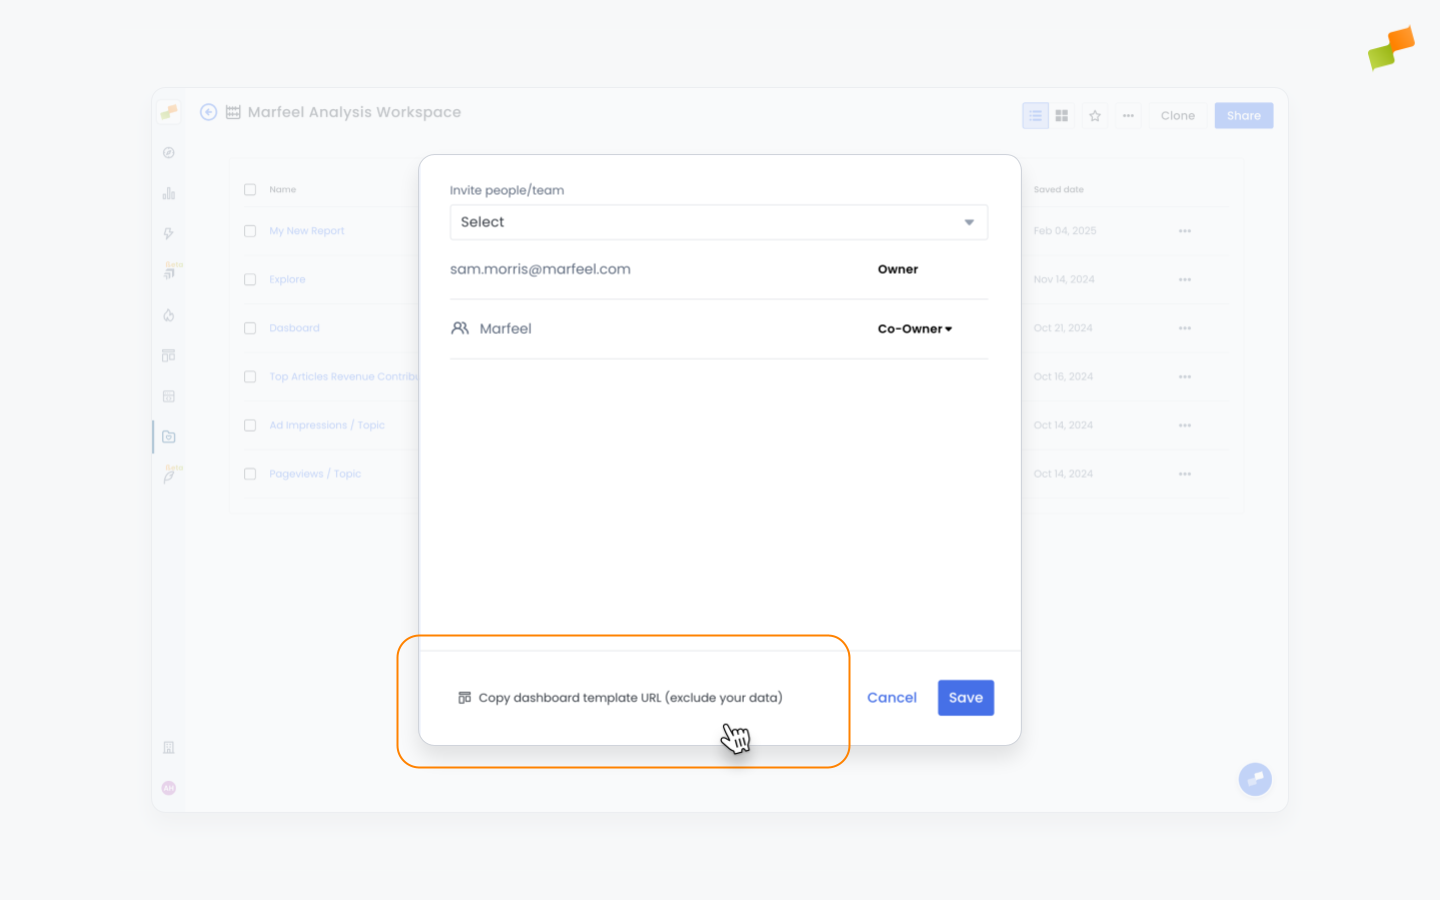
- A special template URL will be copied to your clipboard. You can share this link with anyone who wants to replicate your dashboards.
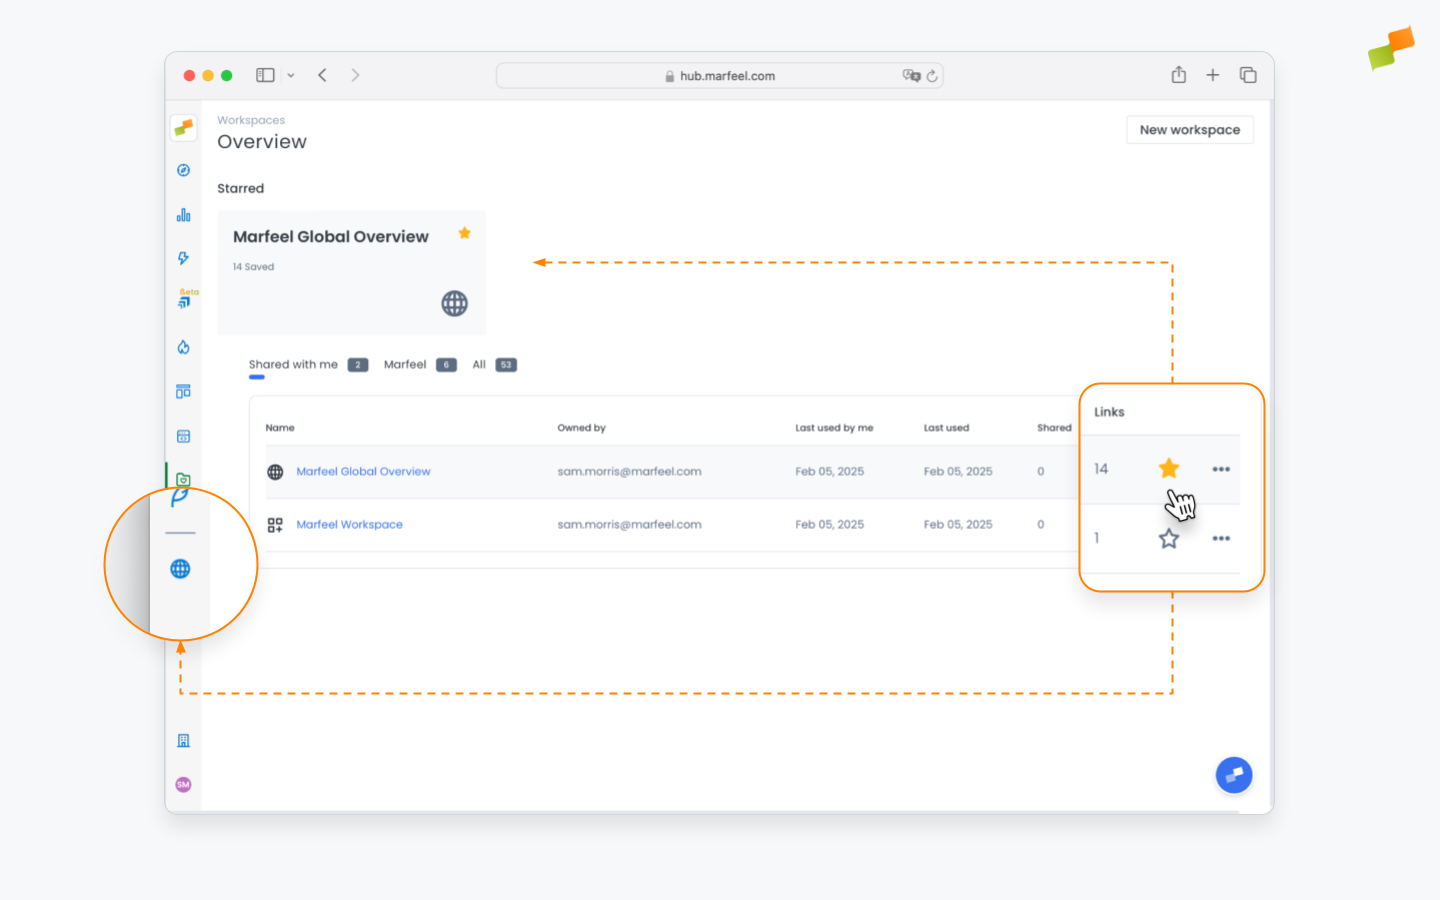
Pinning Workspaces
To make it easier to find and access your workspaces, these can be favorited and pinned to the main menu bar.
- Simply head to the main workspaces panel and click on the ☆ icon on the right of the table to mark the workspace as one of your favorites and pin it to the menu bar on the left.
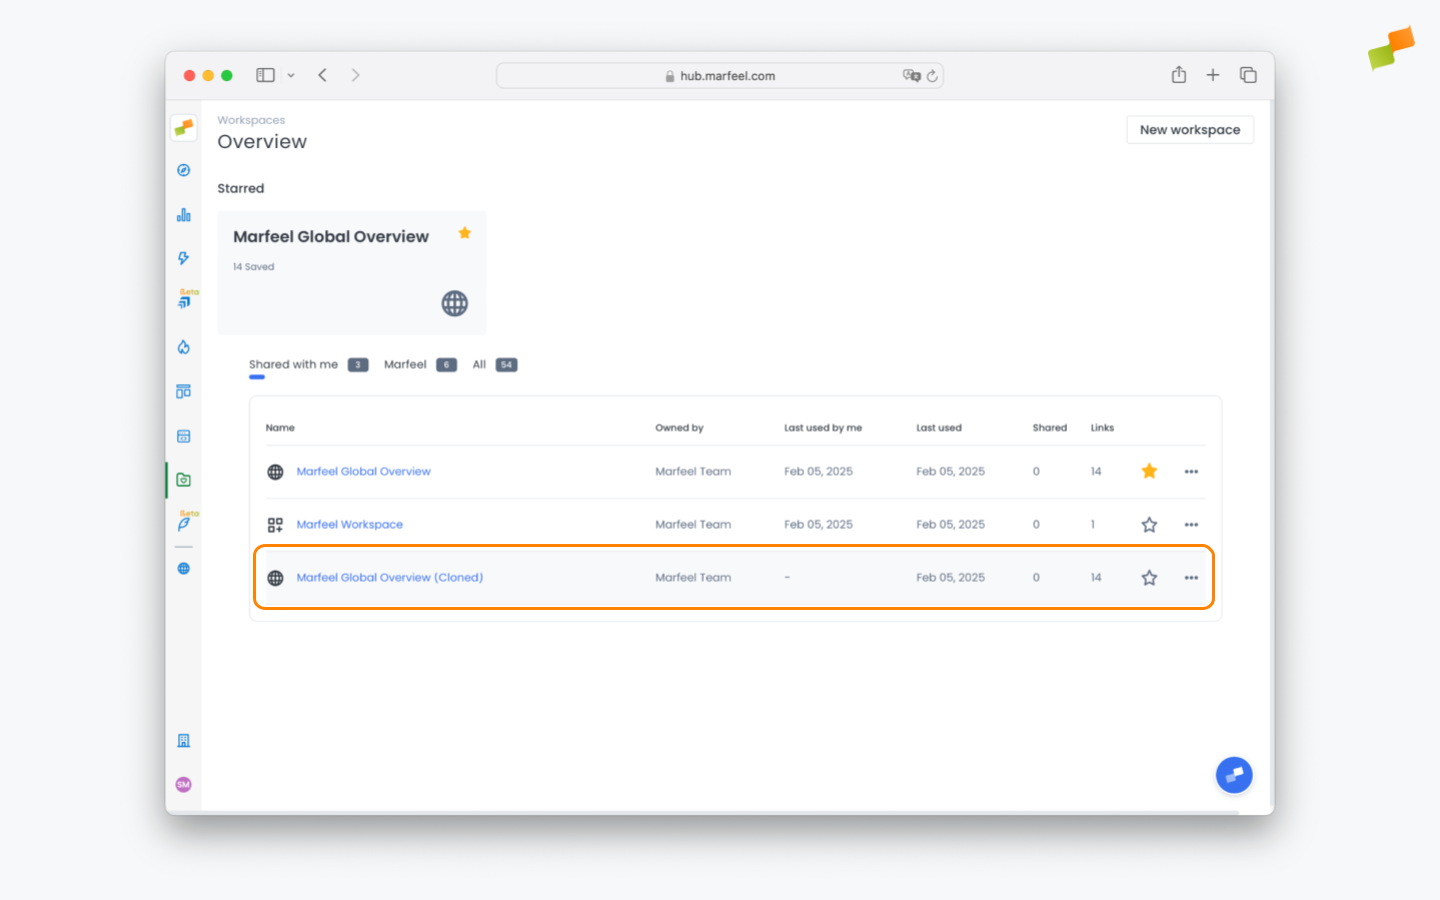
Cloning Workspaces
In some cases, it may be necessary for different stakeholders or teams to have their own instance of a specific workspace, so they can edit it freely without risk of disrupting the work of others. For such cases, Marfeel allows workspaces to be cloned.
- To clone a workspace, click on the
Clonebutton in the top right of the workspace screen and confirm.
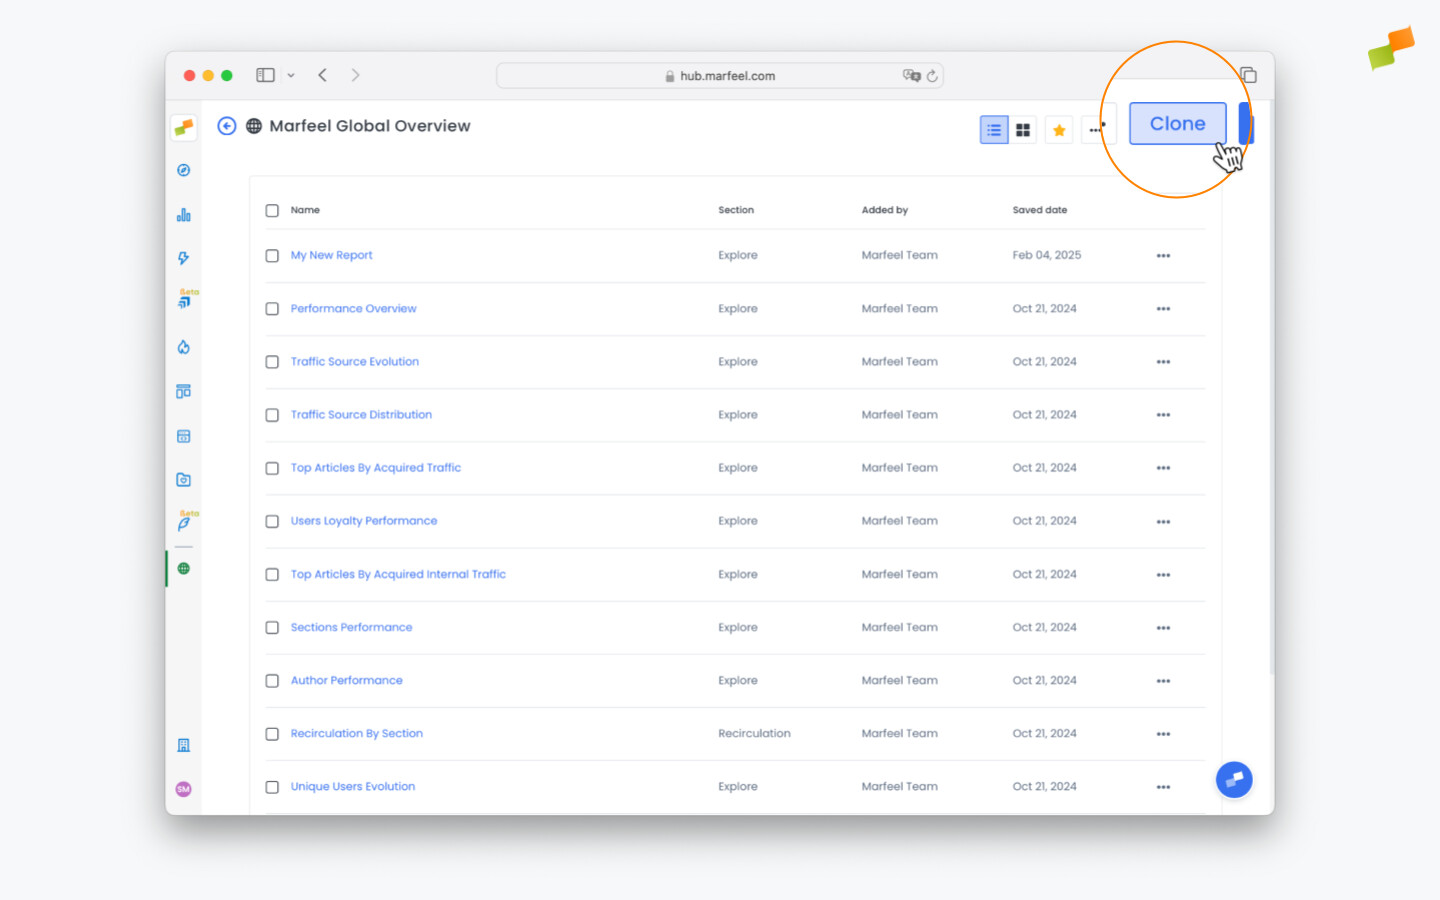
- Your cloned workspace will appear in the main screen along with the rest of your workspaces, from which you can edit it, pin it, and share it with others as you please.