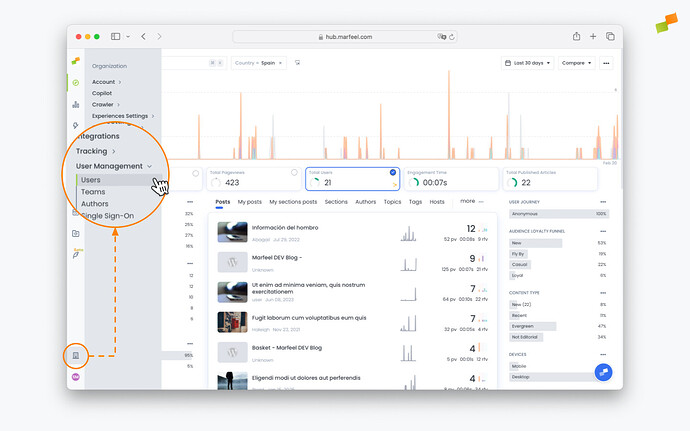
One of the most important duties of the system admin is creating and assigning the correct level of access to all team members who are to use Marfeel. Creating and managing users is done through the User Management view, located under the Organization tab.
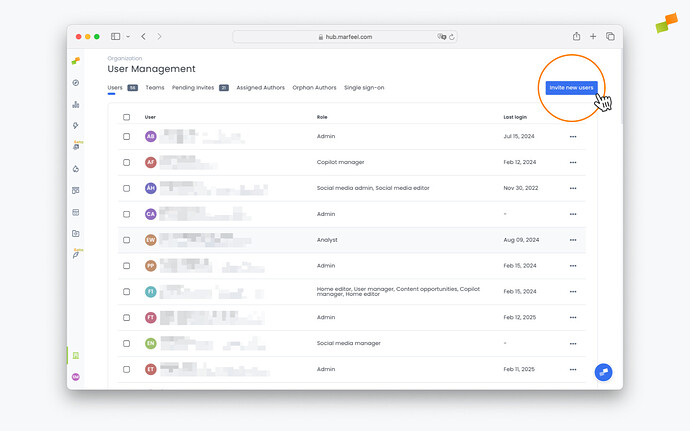
In this view, users are identified by their email addresses. You can see the user roles assigned along with their name and the date they last logged in.
Add users
You can add as many users as you need on all Marfeel paid plans. We strongly believe that everyone in your organization should have access to the same source of truth and be data informed.
To add a new user to an account:
Follow the steps below to assign user roles. Find the definition for each role in User Access Roles.
-
Click on Users
-
Click on
Invite new usersin the top-right corner
-
Add the email of the team member you want to invite
-
Separate multiple emails with a space
-
Select one or multiple roles for the user
Newly invited users will receive an invitation email and will be listed as Pending users until they log in for the fist time.
Edit users
Change the level of access and permissions for a user at any time. Admins and User Managers can modify permissions for an existing user:
- Click on Users
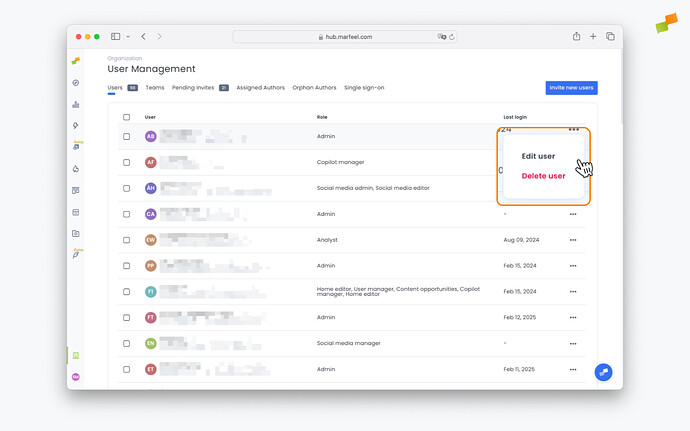
- Click on the three dots next to the data of last login of the user and select
Edit user.
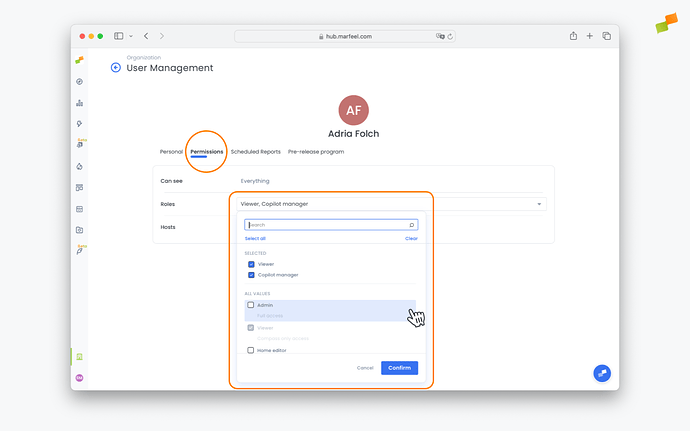
- Select
Permissionsand use the drop-down menus to update the information entered previously. ClickConfirm.
Delete users
- Click on Users
- Click on the three dots next to the data of last login of the user and select
Delete user.
API users
API users aren’t included in the standard list of Permissions, but rather must be added manually by submitting a request via our chat or your account manager. Once an API user is created, admins can manage their access like any other user, including restricting their level of data access.


