As an editor, you have the power to directly influence the content presented to your readers by curating articles within the Marfeel Recommender. Curations allow you to manually select and highlight specific articles in recommendation modules, giving you control over what your audience sees. This guide will walk you through the process of curating an article, including setting priorities, durations, and targeting options to maximize engagement.
What Are Curations?
Curations are manually selected articles that you choose to feature prominently in recommendation modules on your site. They enable you to:
- Promote specific content that aligns with editorial goals, campaigns, or special events.
- Target recommendations based on the reader’s current context, such as the section they’re browsing.
- Optimize the appearance of recommended articles by editing titles, descriptions, and images to enhance engagement.
By using curations, you can apply the same editorial strategies used on homepages and section fronts directly within the recommender system.
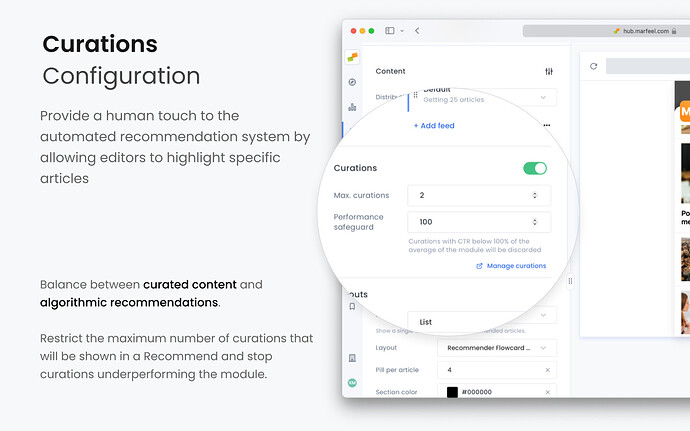
You can enable curations and restrict them from within any recommender experience configuration, in Content tab. Read more.
Step 1: Initiate the Curation via Amplify
- Find the Article : Browse or search for the article you want to curate.
- Launch Amplify: Within the article locate the “Amplify” option in the multi-action button group.
Step 2: Choose the Recommendation Module
- Select Recommender: Choose the Recommender destination on the sidebar.
- Select Module: Choose the recommendation module where you want the curated article to appear.This could be a specific module on your site, such as “Related Articles” or “Editor’s Picks.”
Step 3: Set the Priority Level
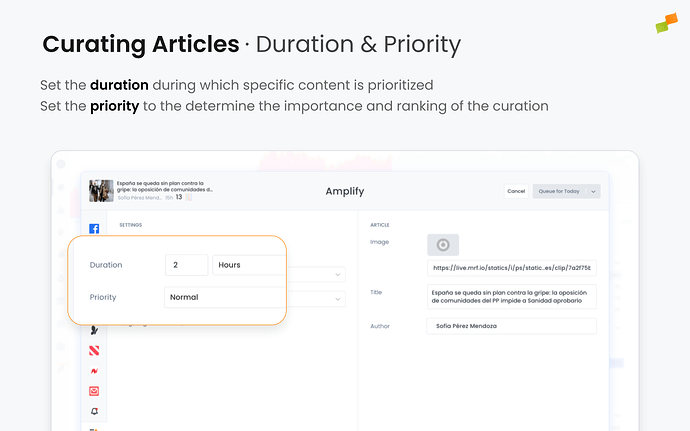
Decide on the priority level for your curation. There are three options: High, Normal, or Low. High priority means the article is more likely to appear in the recommendation module, especially when there are multiple curations competing for limited slots. Normal priority is the standard level, where the article competes equally with other normal-priority curations. Low priority means the article is less likely to appear if there are higher-priority curations available. Choose the priority based on how important it is for the article to be featured, and use high priority sparingly for the most critical content.
Step 4: Set the Duration
By default, the curation is set to display for two hours. You can customize the duration by specifying the start and end times when the curation should be active. Consider aligning the duration with events, promotions, or the relevance period of the content. For example, you might set a curation to run during a conference or a product launch to maximize its impact.
Step 5: Configure Targeting Options
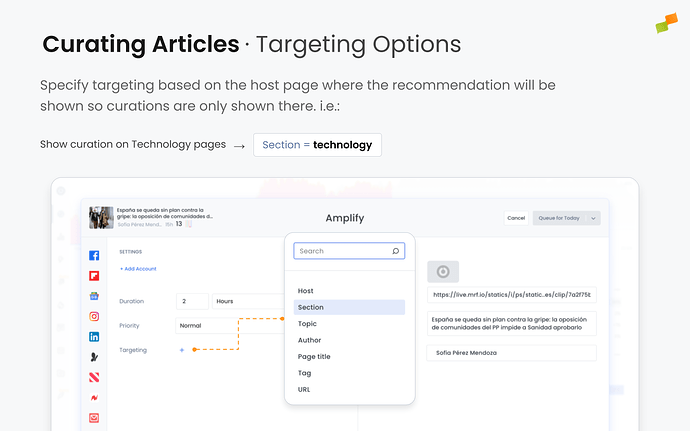
When curating an article, you can specify targeting based on the host page where the recommendation will be shown. This means the curated article will only appear if the reader is reading articles that meet certain criteria. For instance, you can choose to display the curated article only when the reader is on an article within a specific section, such as “Technology.” This approach is ideal for recommending content based on proximity and affinity, and it’s particularly useful for promoting branded content or giving priority to certain topics.
Other targeting options include selecting specific topics or keywords, targeting readers of articles by certain authors, or focusing on user segments such as new visitors, loyal readers, or subscribers. These options allow you to fine-tune who sees your curated content, enhancing its relevance and effectiveness.
Step 6: Customize the Article’s Appearance
To optimize engagement, you can customize the appearance of the curated article. This includes editing the title to make it more engaging or to fit the context of the recommendation module. For example, you might change “New Study Reveals Shocking Health Benefits of Tea” to “Discover How Tea Boosts Your Health.” You can also select a different thumbnail or feature image that is more eye-catching or relevant to the curated context.
Step 7: Save and Activate the Curation
After configuring all aspects of your curation—including module selection, priority, duration, targeting, and appearance—you need to save and activate it. The Marfeel Recommender provides several options for activating your curated article:
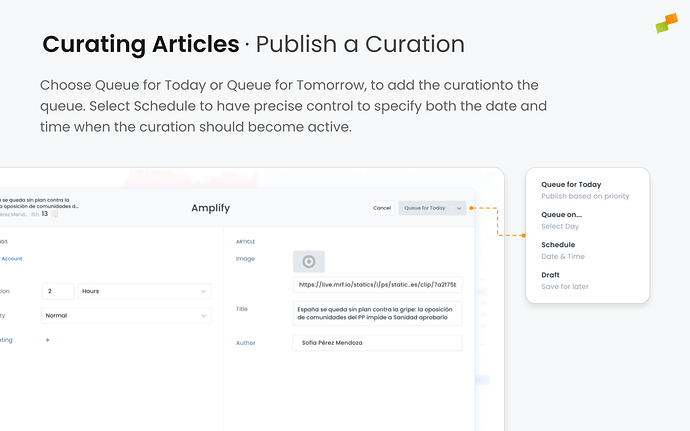
- Queue for Today: Schedules the curation to start as soon as possible today.
- Queue for Tomorrow: Schedules the curation to begin tomorrow.
- Schedule: Allows you to set a specific future date and time for the curation to start.
- Save as Draft: Saves your curation without scheduling it, allowing you to make further edits before activating.
When you choose Queue for Today or Queue for Tomorrow, the curation is added to the queue and will be activated accordingly. Selecting Schedule gives you precise control by letting you specify both the date and time when the curation should become active.
Once you’ve scheduled or queued your curation, the system implements a one-minute delay before activation. This brief waiting period allows you to undo the action in case of any errors or last-minute changes. If you need the curation to go live immediately and cannot wait for the one-minute delay, an information toast (notification) will appear offering a “Publish Immediately” option. Clicking this option will bypass the waiting period and activate the curation right away.
Conclusion
Curating articles within the Marfeel Recommender empowers you to directly influence what content your readers see, enhancing engagement and supporting your editorial objectives. By thoughtfully selecting articles, customizing their presentation, and strategically targeting your audience, you can maximize the impact of your curations. Remember to monitor performance and adjust as needed to ensure your curated content continues to resonate with your readers.


