You can now tag every social post in Amplify and filter by those tags in Explore. That turns your posts into a structured dataset you can slice any way you need.
Two system labels are applied automatically to every post, out of the box:
recommender:name: identifies which recommender published the post. Filter by this in Explore to compare recommender performance directly.user:name: identifies who published the post, whether manually or via autopost. Use it to analyze output and results by social media manager.
On top of that, you can create any custom tags you need. Here’s how you can get started:
- Tag by campaign: mark posts belonging to a specific campaign and pull campaign-level performance in Explore without manual cross-referencing.
- Tag by topic or cluster: encode content categories, topic clusters, or editorial sections to understand which themes drive the most engagement on social.
- Tag any dimension you need: verticals, formats, content types, experiments. If it matters to your analysis, tag it.
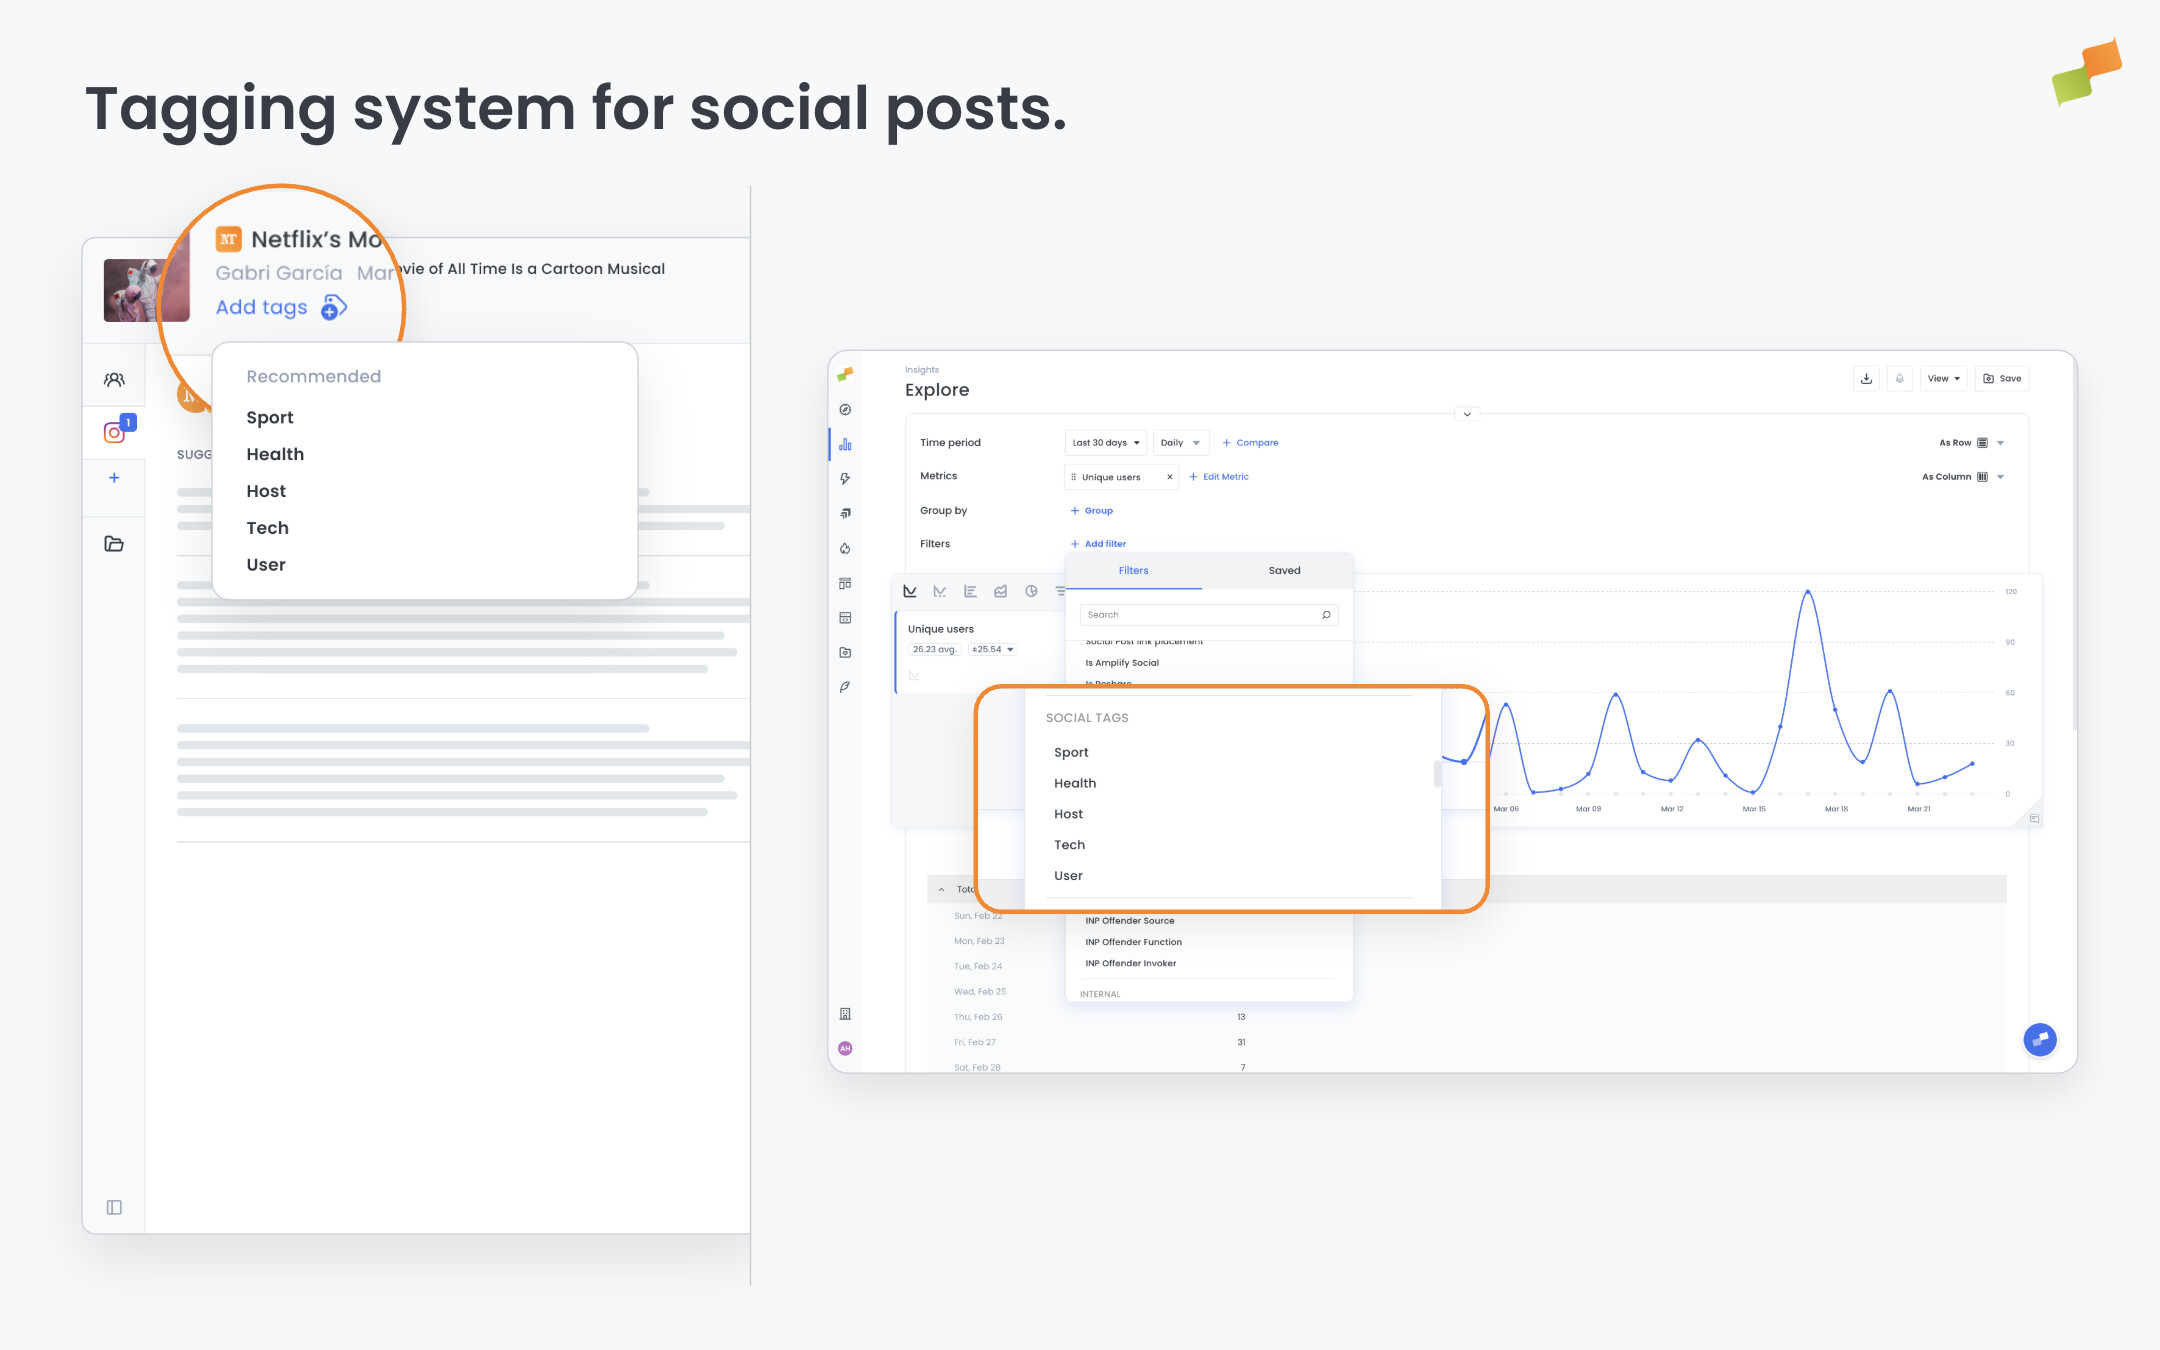
Filtering in Explore works across dashboards, workspaces, and historical reports. You can filter by individual tag value, by tag group, or by tag family. Conditions include equals, not-equals, contains, and not-contains. Search as you type to find the right tags quickly, even with large tag catalogs.
To add tags, open any post to create or edit it. The tag field is in the header of the post modal. Type to search existing tags or create a new one on the spot. Tags carry over when you duplicate a post. System labels do not.
Your social data is only as useful as the dimensions you can analyze it by. Now you define them.